Friday, July 01, 2016

Sketchnoting revisited


Back in December of 2013, I posted a blog entry titled Sketchnoting: A Primer . I had recently been introduced to the topic of sketchnoting and this mode of visual notetaking was just starting to be talked about and tried in schools. That article provided some of the research behind why one should sketchnote, including the important work done by Paivio, Begg, and Sadoski in the development of the Dual Coding Theory. The Dual Coding Theory “was the first systematic, scientific attempt to bridge two traditions in philosophy and psychology: the imagery tradition and the verbal tradition.” (Sadoski, 2009).  The research discovered that the brain processes information using both visual and verbal cues and makes connections between them.

Since my blog post in 2013, teachers have been experimenting with sketchnoting on their own and teaching students how to take visual notes. There are many more resources to look at, learn from, and practice with today!
Kevin Thorn, on his blog, offers a great definition of sketchnoting by defining it as “a form of visual writing by expressing ideas, concepts, and important thoughts in a meaningful flow by listening, processing, and transferring what you hear by sketching either by analog or digital means.”

COMPONENTS OF SKETCHNOTING

 The UXmastery blog breaks the components of sketch noting into planning, listening, processing, and drawing.  Let’s talk about the planning process.  The first thing to do is to decide on your tools. A good notebook and a thin line marker or an iPad app and a drawing drawing stylus are the two basic choices.
 Next, they suggest you practice sketchnoting a TED talk (or a Discovery Education Streaming segment) to help you become adept at sketchnoting a presenter’s talk or content-based video.  Continue on your own to practice basic drawings for things that might pop up in your area of interest  such as basic shapes, basic objects, logos, or brand names. One well-known sketchnoter, Mike Rohde, contends you can create any sketchnote by using just a circle, a square, a triangle, a line, and a dot.
The next part of the planning process is to think ahead. Look at the conference or presentation program ahead of time and populate your sketch with the presenter’s name, the date, the title of the talk, and sign your name to the sketch. You might also want to decide what format you will use — a grid, a map, or a flowchart — and set up the structure on the page.
Brad Ovenell-Carter states that most presentations, meetings, and lectures flow in one of three ways and you should layout your page to match the presentation.
  1. People speak in a narrative. First this  happened and that happened.
  2. In a meeting there is usually an agenda so there might be a section on the page for each short topic.
  3. If a team is brainstorming or you’re just pulling key points from a presentation, then notes usually can wind up anywhere on the page that makes sense to you.
A GOOD sketchnote captures the meaningful bits as text and drawings.  A BETTER sketchnote uses composition hierarchy to give structure to the content and brings clarity to the overall narrative of the lecture.  And the BEST sketchnotes express a unique personal style and add editorial comments on the content– these are entertaining and informative all at once.

PROCESS OF SKETCHNOTING

The actual process of creating the sketchnote takes some practice too, but there are some basic things to remember and Craighton Berman outlines these in a great article entitled “Sketchnotes 101: The Basics of Visual Note-taking”.
  • Text – When recording what is being said, capture the meaningful quotes and key points in text.
  • Containers – Simply putting words inside shapes brings structure to a page.
  • Connectors – Your should connect ideas and pieces of stories with arrows and lines.
  • Frameworks – try to use your own design structure to help you better understand your thoughts later.
  • Icons – Use icons for objects and concepts to represent an idea as simply as possible
  • Shading – Adding simple shading can add contrast to your sketchnote.
  • Color – Use color to differentiate and distinguish information.

LESSON IDEAS

  • This teacher used a science lab setting for grade 5 students to sketchnote, using the iPad, for documenting the process and results of a science lab
  • Katherine Bilsborough was inspired to have students work with sketchbooks in her high school ELA classroom, and has a nice overview of how to introduce the process of sketchnoting.
  • Hall and Russac work with teachers and have students visual note-taking in the elementary grades. Grade 2 students sketchnoted about communities. Grade 3 students sketchnoted about the rain forest. And, in grade 5, students conducted research and drew a sketchnote from their research notes.
  • And, remember, I also have much more information on my sketchnoting page on Kathy Schrock’s Guide to Everything!
Have you tried sketchnoting yourself? Have you had students create sketchnotes? Do you have any samples or lesson plans to share on the topic? Share on Twitter! #kathyschrock

Virtual Reality in the Classroom

This post originally appeared on my Discovery Education blog, Kathy's Kathy, in April of 2016 and is published here with permission.
__________________

We hear a lot of talk about the use of augmented and virtual reality in the classroom to support teaching and learning. Here is a simple explanation showcasing the difference between them.

Augmented Reality
One way to experiment with and learn more about  augmented reality is with the use of the iPad and the app Quiver (previously known as colAR Mix). This app includes design pages to print out and color, and then, when viewing the page through the iPad app, the page “comes to life” and is interactive, as seen below. In addition, students can even record the interactivity as seen in the video below. 


Virtual Reality
To learn more about virtual reality, the use of Google Cardboard is a great way to start. Although the definition above of virtual reality includes the words “alternate world”, I like to describe it as immersion into another place or space.
As an early adopter of  new technologies, I have assembled and experimented with a Google Cardboard device since 2014. For those of you not familiar with the Google Cardboard technology and what it can do, it is really quite simple to get started. You need three things. First, you need a smartphone. Second, you need a Google Cardboard-certified viewer. The smartphone is housed in the viewer and the viewer includes two lenses that focus on the smartphone screen.
Some Cardboard-certified viewers I own include:

And thirdly, using an app on a smartphone, you simply load a VR image, game, or movie that shows up on the cell phone screen looking something like this. You then place the smartphone in the Google Cardboard viewer.


When you view a 360° spherical panoramic image with Cardboard viewer, you are able to move your head up and down, turn your body around, and view a 360° aspect of the image, as if you were standing where the image was taken.
To get a feel for this without Google Cardboard, there are now Web sites that allow you to use your mouse or finger to move a spherical panoramic image to interact with a 360° view. It is not as immersive as looking through a Google Cardboard device, but click on this URL and use your mouse to move the image left, right, up and down to get a tour of my geodesic dome home!
There are are also Web sites and smartphone apps that allow the viewer to both manipulate a 360° image (like above)  as well as view the same image using a Google Cardboard device for an immersive experience. Using your smartphone, download the Round.me app for iOS or Android, search on “Cape Cod Houses” and, when you see the full image of the interior of my house on your smartphone screen, you will also, for a short second, see a little Google Cardboard icon. If you miss the icon, which fades away quickly, just lightly tap your smartphone screen to make it appear again, and then tap the icon. You will see the split view of image, and can load your phone into your Cardboard viewer, and now have an immersive tour of my home!

DiscoveryVR
In addition to static images, Google Cardboard allows you to be immersed in a video, as if you were there. You can move away from the view of the camera to look around at anything you want! Discovery has begun to create virtual reality experiences and tours through their Discovery VR project. In this project, you can view videos in 360° through your computer Web browser or via the Discovery VR app for iOS,Android. In addition, using the same app, you can be immersed in the video via a Google Cardboard device or Gear VR.


I cannot show you the immersive view I see when using Cardboard to view the video, but below is a short movie shot in the the app as I moved from viewing the video in 360° and then viewing it in the way Cardboard needs to see it.


The Discovery VR site  includes many great videos and tours, which include the videos below and others in the areas of extinction, extreme sports, a visit to Austin, and more. With a Google Cardboard headset, students can experience these events as if they were there! And, without a headset, they can interact with the videos and control what items they are viewing.


Creating virtual reality tours
Virtual reality is an engaging way to experience something that you can’t do in real life because you aren’t at the site, don’t like rollercoasters in real-life, or have no desire to really swim with the sharks!
However, the exciting thing about this new technology is your students can easily create their own virtual reality tours to share with the world!  I have just started doing this in the last month, and have created 360° spherical panoramic images and and few videos that others can view with a Web browser or via a Google Cardboard headset. You can see a few of them here. I also discovered, when uploading my VR images to Google Photos, they become interactive when clicked on in a Web browser or in the Google Photos app. Check it out!
The start-up cost is under $400 (in addition to having a smartphone) and I guarantee you and your students will find it as fun and educational to create these images and videos as I do!
My VR toolkit includes:
An iPhone 6s+, the Ricoh Theta S camera, the View-Master VR Starter Pack, aSmatree tripod, and a Promaster SystemPRO TB1 tripod bag (not pictured).


The use of this technology to support teaching and learning, both by embedding videos such as those in Discovery VR to enhance the curriculum or by students creating their own VR images and videos, is starting to be used in classrooms across the world. I add links to my augmented and virtual reality page as I find new information, apps, successful practices, and tutorials, so please visit often!
Have you used Discovery VR in your classroom yet? How about Google Cardboard devices? Have your students created 360° images that others can view? Please share your experiences and ideas with the rest of us on Twitter! #kathyskatch

Tuesday, June 07, 2016

Tech Armor has you covered!

Because I am a "gadget geek", and purchase new tech as soon as it is released, I am always very careful with my current devices so I can sell them when new models come out. I am never without screen protection for any device, and, when Tech Armor asked me to review the screen protection products they offered for the devices I currently owned, I jumped at the chance!

Tech Armor has been selling screen protectors, cases, and various accessories since June of 2012. Their co-founder, Joseph Jaconi, talks about wanting to bring big-brand value to the consumer at a much-better cost, which they have done. However, Tech Armor's commitment to customer service and support (including a lifetime product replacement warranty) is what makes them stand out from the competitors!


All of the protectors I received were made from ballistic glass, which excels at protecting the devices from scratches, has the best clarity, touchscreen accuracy, and leaves minimal smudging and fingerprints on the screen!


TECH ARMOR GLASS SCREEN PROTECTORS FOR IPAD PROS


I have both the iPad Pro 9.7" and the 12.9" and was very impressed with Tech Armor's solution to help apply screen protectors to these larger devices. The inclusion of two small suction cups to support the installation process is a great idea and made the screen protector very easy to install! This ballistic glass screen protector is available for $19.95 for either the 9.7" or 12.9" iPad Pro.


TECH ARMOR SCREEN PROTECTOR FOR APPLE WATCH

I have the 38mm stainless steel Apple Watch with the more scratch-proof glass, but I still worry about scratching the face of the watch.

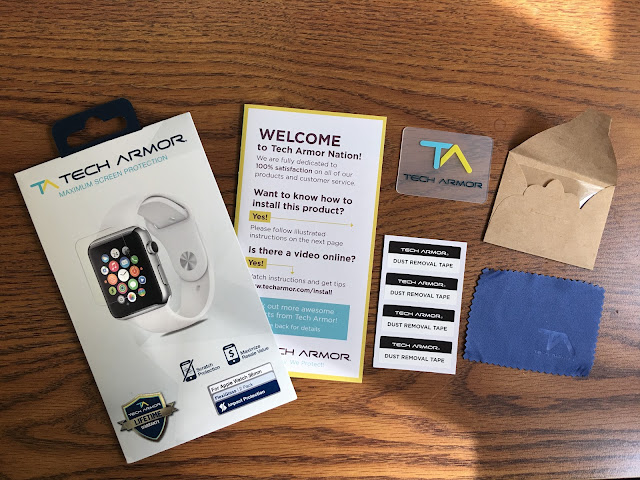
The Tech Armor Ballistic Glass Screen protector ($9.95+) comes with one or two protectors, great instructions, dust removing strips, a cleaning cloth, and a squeegee for removing any bubbles. In addition, there is an online tutorial for those that want to watch the process before applying the protector.


TECH ARMOR IPHONE 6+/6S+ 3D CURVED GLASS PROTECTOR


The 3D curved glass iPhone screen protector ($24.95) provides protection for the phone from edge-to-edge and even curves, oh-so-slightly, over the edges of the phone. The kit includes all the instructions and materials to apply the full-face protector, and comes in black or white.


TECH ARMOR IPHONE 6+/6S+ GLASS SCREEN PROTECTOR


This clear ballistic glass screen protector for the iPhone 6+/6s+ ($8.95) provides complete, clear, coverage for the phone with scratch protection, impact resistance, and minimal fingerprints! This screen protector does not cover the curved edges of the phone, and makes it easy to add a back case for protection, too.


TECH ARMOR ACTIVE SERIES CASE FOR IPHONE 6+/6S+


This iPhone case ($19.95) is a flexible case that adds minimal bulk to the phone, and provides both drop protection and screen protection when your phone is face-down because of the raised edges.

The ports are all easily accessible and the headphone jack port even accommodates a headphone with a bit larger plug size than the Apple headphones.

I have not used this case for too long, but I was concerned that dirt might make its way in through the cut-out square on the back. I have had no problem with this yet, though.


Tech Armor offers protection and cases for many technology products, as you can see below! If you want a low-cost, high-quality product to protect your mobile technology, give them a try!


Wednesday, June 01, 2016

Making the Web work for you


Want to make the Web work for you? Then IFTTT is the tool you must use!
IFTTT, If This Than That, is an online tool and mobile app, IF, that allows you to connect two online-connected services you already use and link them together to automatically precipitate an event or complete a task. This linking is called a “recipe” and these recipes can do everything from saving every Tweet you pen on a Google Sheet to sending an SMS to a family member when you are two miles away from arriving home! (For those of you that want to know how to pronounce this service, it is “ift”!)
A recipe is made up of two parts– the trigger (if this) and the action (then that). Contributors to the site create and share the recipes and you also have the ability to make your own. 
Not every tool or device you use will  be included in the list of tools/sites that can used in a recipe. But many of the most common ones are included. Below is a video that both shows you the current list of apps and items that are supported, as well as demonstrates how to create your own personal IFTTT recipe.The recipe I created in the video will send an email to me each time someone fills out the contact form on my Weebly page.

There are two things I want to point out in the video. First, you need to provide IFTTT with your username and password for the applications you want to connect to. Second, you can decide to share your recipe with the rest of the the IFTTT community. It is always nice to “pay it forward” and share something unique you develop! You can also pause your recipes from running if you need to take a break from them. It is easy to turn them back on, too.
IFTTT also includes another set of tools and three mobile apps, DO Button, DO Camera and DO Note, which allow you to tap the button and “do it yourself”. These recipes allow you to create your own button and start something, end something, take a photo and send it somewhere, etc., manually, versus the automatic running of the IFTTT recipes. 
Note the small icons in the bottom right of the colored section of the DO recipes – the first one is a DO Button recipe, the second a DO Camera recipe, and the third one a DO Note recipe. Remember, these recipes are not automatic. You use them when you want the recipe to run.

IFTTT IN YOUR EVERYDAY LIFE

There are many posts on the Web that list the 5, 10, or 100 “best” IFTTT recipes. I feel that any recipe that automates something and either saves you time or helps you out should be considered a “best” recipe. I combed through the links listed at the bottom of this post and picked out some of my favorite recipes.
  • IF: Send your Facebook status to Twitter, or vice versa by including a hashtag
  • IF: Use SMS with a #FB tag to change your Facebook status
  • IF: Add new US movie release dates to your Google Calendar
  • IF: Get an email whenever there is a free iTunes song download available
  • IF: Automatically download any new Google Doodle to your Dropbox
  • IF: Email your smartphone photos to yourself after you take them
  • IF: Set the time your Belkin WeMo switch turns on and off
  • IF: Automatically share your Instagram pictures to Flickr
  • IF: Save your new Instagram photos to Dropbox
  • IF: When you arrive at the grocery store, text a specific person to see if they need anything
  • IF: Get NOAA severe weather alerts via SMS
  • IF: Send your receipts from a trip to Google Drive
  • IF: Save liked Instagram photos to Google DriveOneDriveDropbox, or your iOS Photos
  • IF: Send someone your location via email (or use their text messaging email address)
  • IF: Share your favorite recipes to Twitter
  • DO Button: Get an email with your current location
  • DO Button: Send an email with your current location (use text messaging address for SMS)
  • DO Camera: Save receipts to Evernote
  • DO Camera: Email yourself a photo
  • DO Camera: Put together a visual shopping list in Evernote
  • DO Button: Trigger a phone call to yourself to get out of an awkward situation
  • DO Button: Let someone know you are heading home (use text messaging address for SMS)
  • DO Camera: Tweet a photo

IFTTT IN THE CLASSROOM

  • IF: Get any comments on your blog sent to you via SMS
  • IF: Append everything you post on Twitter to a new row in a Google Drive spreadsheet
  • IF: Get notified via SMS when the International Space Station passes overhead
  • IF: Convert a DOC or PDF file in a Dropbox folder to Kindle format
  • IF: Save any new photo you take to your Dropbox account
  • IF: Call yourself to create new tasks
  • IF: Text to make Google Calendar events
  • IF: Create a bit.ly address for any iPhone screenshot you take
  • IF: Get a notification when a specific Gmail address sends you an email
  • IF: Log daily rainfall in your city to a Google spreadsheet
  • IF: Get an SMS message before any event starts on your Google calendat
  • IF: Create a Google calendar entry from a voicemail message
  • IF: Send any RSS feed to Twitter
  • IF: Track specific Wikipedia article changes via SMS
  • IF: Save Gmail email attachments to Google Drive
  • IF: If you star an email in Gmail, a reminder is created
  • IF: Every time you take an iOS screenshot, upload it to Google Drive
  • IF: If a students sends you homework as an email attachment, put it in a specific folder on Google Drive
  • IF: If your students publish a post on a class blog or upload a YouTube video to the class collection, publish that info to your classroom or school Facebook page
  • IF: Save Twitter favorites to Evernote, a Google Sheet, a Slack channel, or a weekly email digest
  • IF: When you leave home, get shown your to-do list
  • IF: Create Twitter lists around a hashtag
  • DO Camera: Save a photo to Dropbox.
  • DO Note: Quickly email yourself a note
  • DO Note: Add a note to a OneNote notebook
  • DO Button: Create a digest of notes for tomorrow
  • DO Camera: Upload a photo to DropboxFacebookGoogle Drive, or Flickr
  • DO Button: Keep track of where you were this week
Sites with recipe recommendations for students and teachers

LINKS TO THE IFTTT MOBILE APPS

Do you use IFTTT and/or the DO buttons in your personal life or classroom? Have you found recipes you think are great? Have you created your own? Post your thoughts to Twitter! #kathyschrock
Sunday, May 01, 2016

Stop motion animation in the classroom

Who remembers making flip books when we were younger? We created them by drawing a small image at the bottom corner of a book page and drawing it again, a bit changed on the next page, and so on, and then “flipping” the pages to see the items move.
First popular in the late 1860’s, the creation of flip books has become quite an art form nowadays…people even create flip books for a living! Here is one of my favorites.
Hand-drawn animations began to be turned into feature-length films in the early 1900’s. Disney and Warner Brothers turned animation into a successful commercial venture with their production of movies and cartoons.
Animated videos today still may start with hand-drawn images, but, through the use of wireframe software and computer animation software, animated films are now created with computers and specialized software. Discovery Education Streaming has a great five minute overview of this process that would be interesting to both middle and high school students. However, stop motion animation with physical objects is still a very valid art form!

STOP MOTION ANIMATION IN THE CLASSROOM
Stop motion animation productions, which manipulate physical objects to create the animation, have been a popular project in schools for many years. Traditionally, clay was used for the items in the animations, but, today, everything from staplers to iPads to Legos to bits of paper to any real object are used in stop motion animation projects. Here is one that I created to illustrate the move to an iPad to replace many items found in a student backpack.
Stop motion animation projects can be used across the content areas as students create projects to demonstrate they understand or have mastered the concepts being taught. The National Film Board of Canada has a wonderful series of online tutorials to help teachers learn both ideas about its use in the classroom and the process of creation.
Some of the projects they suggest students might create as a formative or summative assessment have students:
ENGLISH
  • Interpret a scene or passage from a movie, novel, poem or play
  • Recount a story that seeks to preserve cultures and traditions
  • Re-enact a short fable, legend or myth
MATH
  • Visually exemplify how math can be used to solve real-world problems
  • Visually exemplify mathematic principles such as the isosceles triangle, pi, or Pythagorean theorem
  • Demonstrate the transformation of objects
  • Illustrate a math strategy
SCIENCE
  • Visualize a part of the human anatomy and how it works
  • Visualize a molecular structure or growth of plants or animals
  • Visualize how levers, pistons or pulleys work
  • Simulate chemical reactions
  • Help them visualize molecular concepts, electrons, protons or micro- scopic work
SOCIAL STUDIES
  • Tell a story about lives, events, places, environments or eras
  • Visually depict world discoveries or significant historical events
  • Represent a certain time period in relation to a famous historical figure
  • Depict controversial topics such as world disasters or wars
  • Depict geographical concepts
HEALTH
  • Depict a healthy activity or lifestyle
  • Address a social or self-esteem issue
  • Present a health promotion topic
  • Address unhealthy behaviours—such as bullying, smoking, addiction, eating disorders, peer pressure
  • Provide a lens into the consequences of poor health choices
ARTS, MUSIC, THEATER
  • Provide a representation of an artwork from a particular era or place
  • Provide examples of different art forms
  • Portray an interpretation of a dance or art technique
  • Tell a theatrical story
  • Reproduce and reinterpret original animated artistic works
PROCESS
As with any video creation, students should first create a storyboard to sketch out their ideas for the animation video they are going to create. This should be followed by a written script including the outline of the action/characters. The next step would be to determine what medium they are going to use for the objects in the video– will it involve real people, clay figures, Legos, classroom supplies, or something else? All of the assets should be gathered and/or created before the shooting of the animation video begins.
The actual process of creating the stop motion animation video is simple– students put a camera on a tripod, create a “stage”, put the item(s) to be animated on the stage, and take the first photo. Then, they move something on one of the objects on the stage, take the next photo, and keep repeating this process until the story/video/demonstration is complete. (One rule of thumb is for students to take 10 different images for each second of video they want to create.) Once the photos are taken, they are moved into a video editing piece of software like iMovie or Adobe’s Premiere Elements or use an online tool like WeVideo.

UISNG MOBILE DEVICES FOR ANIMATION
One of the hardest parts of creating a stop motion animation project is keeping the camera still. With digital cameras, each time a student take a picture, the camera moves a tiny bit resulting in a shaky final animation.
Apps for the iPad have solved this problem and added useful features which make it easy to create a smooth animation. My favorite app for creating stop motion animation projects is Boinx Software’s iStopMotion for iPad. It is well-worth the $11.99 for a single copy and it is worth contacting the company or looking to see if it is in the Apple VPP for multiple copies. The companion software for this app is free and is called iStopMotion Remote Camera. Here’s how it works– the iPad is set up so the camera is trained on the stage. The second iOS device, which has the Remote Camera app installed, actually triggers the camera on the iPad so there is no need to touch the iPad that is looking at the stage and the animation stays smooth! Of course, iStopMotion for iPad has tons of other features including onion-skinning which allows the students to see a light overlay of the previous image taken when moving their item on the stage for the next shot. Here is a sample of what that looks like. And, when all the shots are done, the app creates the final animation video.

For younger students, although it does not have the remote camera option, I like the myCreate app ($4.99). With this app, students get to see the previous shot and the onion-skin on the shot they are about to take at the same time.
Screenshot from myCreate app
For Android devices, both the Motion or Stop Motion Studio app get good reviews. I could not locate an Android app that included a remote shutter trigger companion app, though.

CELL ANIMATION
Students can create a cell animation project with Microsoft’s Powerpoint, Apple’s Keynote, or Google Slides software. Using the shapes in the software, they can create one slide, duplicate the slide, move an object on the new slide, duplicate the slide, etc. and even add in other objects as they go along. When it is time to play the project, students just set the transition between slides to be automatic and 0 seconds (or the least amount of time possible) for the transition. Here is a sample of an animated digital story from a ninth grade student in Australia. It was created with 260 slides.
Video Player
00:00
01:07

CUT-OUT ANIMATION
The Common Craft “In Plain English” series has created a new form of animation in the classroom.  The cut-out animation process is created by using paper cut-outs that move on and off of the stage. These assets are easy for students to create and and they are made using the same animation process as the stop-motion animation videos– a photograph of each movement brought into a movie-making tool. 

Below is a sample of a student project using cut-out animation.

Do you have students creating stop-motion animations in your classroom? Do you have great resources or student samples? Share on Twitter! #kathyschrock