kathy@kathyschrock.net

Friday, February 28, 2020

Review of Robo™ Wunderkind Robotics Kit

I admit it. I am not a coder. I have dabbled with block-based coding, Sphero, and some other products, but the last real coding I have done was in 1972 when I created punch cards to count from one to ten for the IBM System/360 at my high school!

Pete Birkinshaw, Used Punchcard, https://www.flickr.com/photos/binaryape/5151286161

So, when Robo™ Wunderkind asked me to review their Education Robotics Kit for elementary students, ages 6 to 12, they were happy to hear I was no expert, since the kit was so easy to use! (Probably these early learners have much more recent programming experience than I have!)

Upon opening the box, I was presented with colorful cubes with electronics, wheels, buttons, lights, and more.


The overview book, which explained the role of each piece, was easy to understand and I felt confident I understood each component.


I took the items out of the box and arranged them in my workspace. I also charged up the orange Main Block with the included USB cable.


Each color block has its own role.

  • The orange Main Block powers the robot, Bluetooths to the student's mobile device where they use the app, and controls all the other blocks.
  • The green Connectors have electronics, and both hold blocks together as well as allow block to communicate with each other.
  • The little green Lego® Connectors allow students to build up their robots by using Legos on the small baseplates.
  • The red Button is a smart button, which knows when students press and release it.
  • The yellow Light is just that...a programmable light source.
  • There are two large green wheels and a small, articulating green wheel.
  • The big red block is a Distance Sensor which measures distances to objects and well as detects sound.
  • The darker blue Motors helps a student's robot to move around.
  • The lighter blue block is a Servo which can rotate the robot to precise angles.
  • The green and black Wired Connector can connect blocks that are not next to each other and help go around the blind sides of the blocks.
  • There is also a little plastic pry bar which is used to separate the Connectors from the blocks, when breaking down the robot, in a way that protects them from too much force. Students under 10 may need some help when prying, since the Connector components fit rather snugly.

The first step was to attach the Main Block to the app on the mobile device via Bluetooth. It was a simple process that students, once shown how to do it, would be able to complete. At various times, as I built the robot and snapped on pieces, the app prompted me to tap the screen to apply a quick little update to the piece. In addition, there was a firmware update for the Main Block, too. These updates were simple to apply, and completed by tapping a button on the screen of the mobile device, so students will have no problem completing the task.

I then visited the Web site for a quick overview of the basics, and looked at some of the projects that were available.


The robots students create are controlled from an iOS or Android device. There are two different apps to support the robots- Robo Code and Robo Live.

The Robo Code app (iOS | Android) is the place to learn how to build, how to control, and to try building the sample robots in the tutorials. This is also where students can store, edit, and update their own projects. The sample projects showcase each of the robotic components, so students can learn about them and then experiment and create their own unique robots!

The Robo Live app (iOS | Android) allows students to remotely control their Robo Wunderkind robots by using a drag and drop interface to control the robot's actions like driving, turning, making sounds, and blinking.

I decided just to put some blocks together, based on what I had learned thus far, and came up with this simple robot. I actually clapped when it worked!


I then did a little digging in the projects in the Robo Workshop in the Robo Code app and made both a flashlight, which used the Light, and created an obstacle avoider that used the Distance Sensor block.


I had a ton of fun and learned how to both build and create code to make my robots do what I wanted them to do! I spent about 90 minutes reading the basics, creating my robots, coding my projects, and taking notes, photos, and videos for this blog post.

I feel the Robo™ Wunderkind robotics kit and the two apps -- Robo Code and Robo Live -- would be a great addition to a STEM program or a class that includes programming. The drag and drop interface to code the robots is easy to use and has sounds, effects, timings, and more to allow simple or complex programming for the robots. The kit includes enough pieces to make fun robots and make robots do fun things! 

Although the kit states it is intended for students ages 6-12, my recommendation would be to start with age 6 and go right up through high school. The Robo™ Wunderkind kit can be an introduction to electronics, programming, and coding at any age. (Even at my age!)

Getting a Robo™ Wunderkind kit for every four students in a class would allow collaborative building and coding, along with the creative aspects of design, the math computations of angles, and classroom contests with the robots! 

I received a Robo™ Wunderkind robotics kit to keep for writing this review.


Wednesday, January 01, 2020

Questioning skills to support design thinking

The first step in the design thinking process, empathizing, requires students to identify a problem or process from the point of view of the intended audience. Developing this empathetic mindset requires asking lots of questions of others and themselves. (For more on the design thinking model, take a look at my Kathy Schrock’s Guide to Everything: Design Thinking page where I include overviews, lesson plans, and videos for incorporating the design thinking process across the curriculum.)
Learning to ask good questions takes a lot of practice. As educators, we spend time developing essential questions for units of study. I often refer to the work of Jay McTighe and Grant Wiggins dealing with essential questions. I use their book and summaries to help teachers learn the best way to develop these types of inquiry-based questions. Here is a cheat-sheet for teachers, developed by Intel, covering the McTighe and Wiggins model of teacher questioning. Another interesting publication, the EQ Guidebook, from the Global Digital Citizen Foundation, provides practice and tools to help you turn a non-essential question into an essential question.
As I looked over the McTighe and Wiggins list of the seven defining characteristics of an essential question, I was struck by how some of these same characteristics could be utilized by students as they develop their inquiry question for their design thinking project. The useful characteristics from McTighe and Wiggins include these which state that a question:
  • Is thought-provoking and intellectually engaging, often sparking discussion and debate.
  • Calls for higher-order thinking, such as analysis, inference, evaluation, prediction. It cannot be effectively answered by recall alone.
  • Raises additional questions and sparks further inquiry.
  • Requires support and justification, not just an answer.
Asking factual questions is easy. Coming up with well-created questions to guide a project also takes some additional study of the types of questions. Jorge Juan Perales provides a useful article for designers on how to develop good questions. Perales also included an interesting portion of a book by Michael J. Marquardt, Leading with Questions: How Leaders Find the Right Solutions by Knowing What to Ask, which provides a great overview of the various types of open-ended questions that can be used by students to start the design thinking process.
  • Explorative questions force expansion on new points of view and uncovered areas. Have you thought of…?
  • Affective questions reveal people’s feelings about something. How do you feel about…?
  • Reflective questions encourage more elaboration. What do you think causes…?
  • Probing questions invite a deeper examination. Can you describe how…?
  • Analytical questions look for the roots of a problem. What are the causes of…?
  • Clarifying questions help align and avoid misunderstandings. So, you mean that..?
If students have trouble with brainstorming or coming up with an idea or question for an invention or innovation, here is an exercise from Invent Iowa’s former site that can help. Have students pick one item from each column and see what interesting inventions they come up with. After they get the hang of it, have students add additional words to each column to create even more choices. You can also extend this activity by having students write the inquiry question for the invention/innovation they develop. For instance, the innovation “Furniture that reduces the dangers for small children” might prompt an inquiry-based question of “How can furniture be developed to make sure young children are both comfortable and safe?”

STUDENT QUESTIONING SITES

FOLLOW-UP

How do you teach students to create inquiry-based questions?  Do you have a particular model you use (or have developed) to target the empathize component of the design thinking process? Please share on Twitter! #kathyschrock

Friday, November 01, 2019

Teaching perspective to build empathy

Empathy is defined, as per the Teaching Tolerance site, as “the understanding of, or the ability to identify with, another person’s feelings or experiences”.  This ability to put oneself in another’s shoes does help students build empathy and tolerance toward others. There are some great ideas online and in the Discovery Education Streaming  resources to support the teaching of the skillset involved in developing empathy. One of the areas included in this skillset is understanding the concept of perspective.

ONLINE RESOURCES

11 Activities to Help Students Understand Different Perspectives

Marsha Rakestraw, on the The Institute for Humane Education site, offers a series of age-appropriate lesson plans, mapped to the Common Core State Standards, that scaffold the understanding of perspective from grade two through twelve. The activities range in complexity from an hour-long lesson for the younger students which has them considering the commonalities that humans, cows, pigs, and chickens share, to a 90-minute activity that “inspires (high school) students to think about their own areas of prejudice, to identify how we develop our attitudes about others, and empowers them to take action to reduce bigotry in their own lives and in society.”

How To Teach Perspective-Taking to Children

This post, intended for speech-language pathologists working one-on-one with a student, includes activities that would be useful for K-12 classroom teachers and whole class discussion, too. Broken down by grade levels, each overview starts off with the typical skills of the age group and is followed by three practical activities to help students learn to look at situations from another’s point of view.

Perspective, People! Ideas on Teaching Literature

I love this blog post by Stephanie Jankowski. She realized her students struggled “with the idea that a narrator’s perspective is narrow and limited in that he tells the story through his own lens, based on his own experiences” in the literature her high-schoolers were reading. Jankowski created some practical point-of-view and perspective activities that could work across all the subject areas .

Finding Another Perspective

The first lesson plan, subtitled “Determining and actively seeking alternative perspectives to enhance our understanding of an issue”, provides a model for grades 2-12 that includes multiple activities that are practiced over a period of weeks. The components include large class discussion of point-of-view and perspective and identifying the stakeholders. The second lesson focuses on students finding and taking another perspective for various scenarios and also includes a useful student rubric.

Through Others Eyes: The Power of New Perspectives

Kathleen Cushman, of the New Teacher Center, provides a comprehensive overview of the teaching of perspective and its impact on empathy for the middle and high school student. Some ideas she includes are role-playing, the use of art and literature, and open discussions. This post includes a wonderful section on cultivating empathy with self-reflection. Cushman includes a useful list of questions for this.
    • If I were this person, how might I be feeling?
    • Can I come up with more than one way of seeing the situation?
    • What might have happened in the past that would cause this person to feel this way?
    • What unmet need might this person have?
    • Am I feeling frustrated?
    • Am I willing to listen and be open?
    • Am I willing to stick with an uncomfortable conversation?
    • Who or what does this person or situation remind me of? Am I reacting to something from my past?
    • Am I setting clear and healthy boundaries?
    • What does my body language show?

Critical Literacy: Taking Multiple Perspectives

This ninth grade Applied English unit from EduGAINS includes wonderful lessons, support materials, and information for the teacher. I feel it could be used from grades 7-12, too. The guiding questions for the unit are:
• How does who I am shape my perspective?
• How can I increase my understanding of the perspectives of others?
• What does it mean to take a position on an issue?
• What are some possibilities for action with or against a situation?
• How do we write a position statement or a position letter?
The unit uses whole class and small group activities, activator and summarizer strategies, and a series of questions for the teacher to help them develop strategies to move towards more student-driven classrooms.

Do you teach empathy and/or perspective in the classroom? Are there some other methods you know of to teach perspective to help students develop their empathetic mindset? Are there resources you would like to share? Please do so on Twitter! #kathyschrock

Tuesday, October 01, 2019

Virtual field trips

Face it, we all love field trips! Getting out of the school and visiting an historic site or attending a performance is fun for everyone! Well, maybe not for everyone. Having chaperoned fifteen, four-day trips to Washington, DC with eighth-graders, I can attest, while exciting and fun, it was also exhausting!

With today’s budget constraints and testing schedules, there may be money and time set aside for one great field trip per year. However, taking students on a virtual field trip from your classroom can easily be worked in-between testing weeks  and, with a little pre-planning on your part, will be fun and exciting! (And not exhausting!)
PLANNING FOR A VIRTUAL FIELD TRIP YOU CREATE
Annette Lamb offers some great tips for a successful field trip in the classroom. (She also covers how to create a virtual field trip to share with other educators from a real-life field trip you take.)
Begin by considering the purpose of the field trip. What will students be able to do or talk about when they’ve completed the experience? How does the experience connect to curriculum goals and the development of an information fluent (student)?
We often prepare students for real-life field trips with resources created by the museum, theater, or historic site we are going to visit. Tying the virtual field trip to the content being studied is important, too. Once you have figured out the content you want to cover, here are some things to think about.
  • Research what is available already on the Web that can be a stand-alone virtual field trip or some resource which can be part of a virtual field trip you are developing from scratch.
  • Always prepare a back-up plan. For real-life field trips, we always have an alternate plan if it rains on the field trip day. Consider the things that can go wrong with a virtual field trip — the site(s) you want to use are no longer found, they not available during your field trip experience, or the bandwidth in your school is not robust enough for each student to stream the field trip site(s) at the same time. Technology is great when it works, and, nowadays, it most always does, but have a back-up plan, too!
  • Annette also includes some fun ways to begin the virtual field trip. For the younger students, line up the classroom chairs in the hallway as if they were bus seats. (You can be the bus driver and tour guide. Dress like one.) Have the students take the “bus” trip through history or your town, and introduce the topic being covered in the virtual tour. (Try not to encourage a round of “99 Bottles of Beer on the Wall”, since other classes may be disturbed!)
  • For the older students, take them outside to the school’s track, set a 1 round = x number of miles goal, and have them walk the distance to the virtual field trip. We had a teacher in our school who used my husband’s Appalachian Trail thru-hike slideshow and had the students walk the “distance” between each of his hiking days, and then come in to the school, view the slides for that “day” and conduct research on the items they viewed. This physical “ride” or “walk” to the field trip can be a fun addition!
  • Plan a follow-up reflection or project after the virtual trip. Have students create something in a Makerspace or online and present their take-away to the rest of the class.
FINDING A VIRTUAL FIELD TRIP
It might be worth the time to locate a virtual field trip online and have your students participate before creating a virtual field trip of your own. You will be able to see what works well in your classroom with your students, and avoid any snafus in trips you create.

Resources from others
I have only touched the tip of the iceberg with these resources to support virtual field trips. Here are some additional links from other you might find useful.
If you have some virtual field trip resources you recommend, or want to share virtual field trips you have created with the rest of us, please leave a note on Twitter. Happy traveling! #kathyschrock

Sunday, September 01, 2019

Classroom centers to support learning


I did my student teaching in a second grade classroom at the Knollwood Elementary School in Piscataway, NJ in the spring of 1979. I was big into learning centers and spent a lot of time with Imogene Forte’s bulletin board books. I traced and cut out images for many activities for centers in all the subject areas. I even created a center with cut-out sandpaper letters to help students practice tracing their letters. (Probably not the smartest creative activity— besides wrecking my future husband’s scissors, the students wound up with scraped fingers pads after tracing on the sandpaper a few times!)
My centers included only single-student remediation or extension activities. I had yet to learn about student collaboration or cooperative learning. My pedagogical base consisted of teacher talk/student listen, practice, testing and IALAC. In addition, there was only a single, small student desk in the back of the room on which to set-up up a center.
Fast forward forty years and different formats of learning centers have been developed, collaboration is an important part of every school day, and configurable classroom furniture now allows a collaborative center anytime, anywhere in the classroom.
There are many well-done online resources to support the effective use of learning centers in the classroom. Here are a few of my favorites.
This article breaks down learning centers, which are defined as
a space set aside in the classroom that allows easy access to a variety of learning materials in an interesting and productive manner.. (and).. are designed to enhance the learning of concepts, skills, themes, or topics
into three main types- enrichment, skill, and interest/exploratory centers.
Enrichment Centers
Enrichment centers are centers that provide students with activities and resources to enhance their understanding of a concept after it has been taught. Most times, the activities are scaffolded to provide each student or group of students with a choice of meaningful activities based on their preferred method of learning.
Skill Centers
In a skill center, also used after the topic has been studied, students do not get to pick their topics, but are assigned one to complete. The skill center is intended to reinforce what the student has learned.
Interest and Exploratory Centers
Interest and exploratory centers allow students free choice of topics to study and may include hands-on experiences. These centers allow students to explore their interests and can be used as a springboard to enhance creativity in the classroom.
All of these learning center types have components in common. Be prepared to re-arrange furniture in the classroom to allow for quiet and group spaces. Make sure to include specific steps or directions at the center for its use and review your expectations and directions with the entire class. For a technology-based center, consider including a video overview of the instructions which includes a transcript to support both accessibility options and the visual learner. YouTube is a great place to host videos because of the transcripts that are automatically created.
Alison Stumacher’s article provides a different view of the use of learning centers in the classroom. She is a third grade teachers and outlines her journey for effective use of centers in her classroom. Her list includes-
After creating and communicating the procedures for the center with the class, provide practice sessions with various students to illustrate what use of the center should “look like”.
As with any cooperative learning experience, consider pre-grouping the students who are working at the center on  based on interest or ability.
Include processes in the center instruction that provide practice in real-life skills, whether it be evaluation of Internet resources or other digital citizenship skills practice.
Be sure to monitor student progress, as with any formative or summative assessment, and re-work the center to provide additional directions, enhanced activities, or practice as needed.
Today’s learning centers
Over the years, many learning centers have been “analog” centers with laminated instructions, consumables, and paper. There are online sites that include ideas such as putting the materials for the learning center in folders at the learning center to make the teacher and student clean-up easier and having students leave their completed work in a basket.
With the infusion of technology into the classroom, the pendulum then moved  to “computer learning centers” which were totally digital experiences. Students were given a URL to an online site or teacher-created experience, and submitted their work directly to an online folder.
I believe the best learning centers, in today’s classrooms, include both real and virtual components. Online instructions and procedures are great since students can refer back to them whenever they need to. Submitting work to Google Classroom or another CMS can streamline the process of review, peer editing, and grading. Having hands-on materials available to create prototypes and projects supports small group work in a way that online collaboration cannot easily replicate.
Are you already using center in your classroom to support or in some other innovative way? Please share your ideas and thoughts on Twitter! #kathyschrock

Friday, August 30, 2019

uHandy Mobile Microscope Duet review

Okay, I have not had this much fun since I got my first microscope when I was 10! I have always loved the microscopic world, and even conducted research on blood cells for a pharmaceutical company for my senior project. 

During the project, I had to remove blood from various animals (rat, rabbit, dog), spin the pipettes in a centrifuge, smear the blood on slides, and manually record the number of different types of white blood cells using an electron microscope. It really is true that the hands-on projects are the ones we remember the most! (I found a video of the type of manual counter I had to use on YouTube!)

If students do not have a microscope at home or limited access to one at school, they may never have the chance to explore the microscopic world in depth. This love could lead students on a career path they never thought they might take.

uHandy ask me to review their Mobile Microscope Duet and, after taking a look at it online, I readily agreed to test it out! I could not wait for it to arrive! (And they have even included a promo code for me to give out for a teacher discount!)

When I first opened the box, I was impressed by the number of items included and the well-written and illustrated user guide that had me up and running quickly! The first step was to install the uHandy app for iOS or Android. The app allows students to capture items as images or videos, adjust focusing, and switch between the Low-Mag and High-Mag lenses.


Low-Mag lens attached and three samples to try


My first experiment was to clip the Low-Mag (10x-300x) lens onto the back camera of my iPad Mini and attach a sample sticker of a down feather to the sample cap of the Lo-Mag lens.


The Sample Cap with the sample.


The result was impressive as you can see below!
View of a down feather with the Lo-Mag Lens.

I then took the plastic cover off of the sample cap so I could view a sample that was irregular. I picked a coin to view.
View of a quarter though the Lo-Mag lens

Next came experimentation with the included Light Stage. Students can easily view a sample with the naked eye via its backlight.
Sample on Light Stage


High-Mag Lens
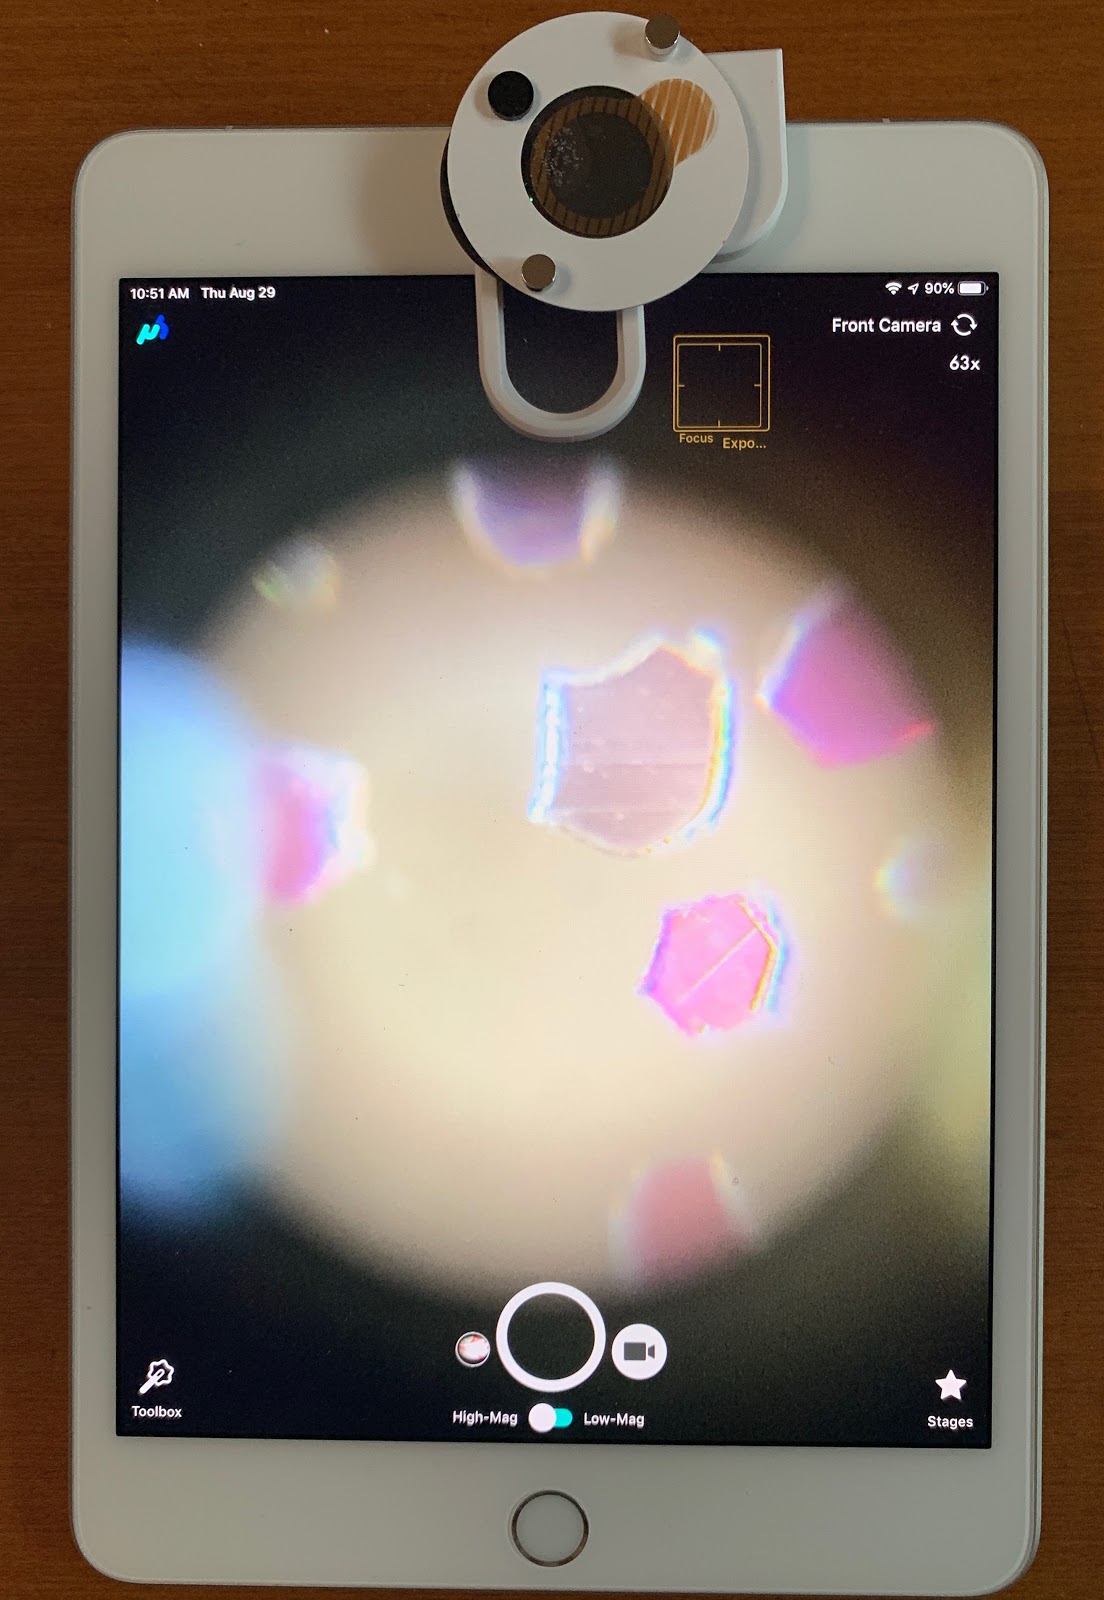
The High-Mag Lens (30x-1000x) can attach to the back of the mobile device, and the Light Stage can even be magnetically attached to it. And, when students move the High-Mag lens to the front camera, they can use the Circular Glass Slide and put liquid on the glass to view through the mobile device. And, if students create their own specimens using the Sample Stickers, they can easily store them in the included collecting album or any notebook. 


High-Mag Lens with Circular Glass Slide

The Light Stage, with the attachment of the stainless steel slide holder, can accommodate a regular glass specimen slide, too, and can be attached to the High-Mag Lens for viewing.


Another cool feature is that students can have both the Low-Mag and High-Mag lenses attached to the mobile device and switch back and forth between them, as illustrated in the video below.


The uHandy Mobile Microsoft Duet includes 180 sampling stickers for students to use for their own samples, 60 sample cards (which are called the Sample Hub) to create collections from their samples, and a collection album in which students can store their own samples and add notes.
Collection items included 

In addition to students using the Mobile Microscope Duet to complete classroom lessons, there are over 50 topics to explore found in the uHandy app. They include instructional videos at different levels of difficulty and projects for students to complete.
Some lessons included in the uHandy app

Instructional video for one of the projects

After putting the uHandy Mobile Microscope Duet through its paces and trying all the included options, I would recommend this for grades 6-12 science classrooms. It would make a great addition to a traditional science lab table as students could use their own mobile devices, capture the samples as images or videos, and use their findings in reports and for research purposes. Also, all the students can view a sample at the same time via a single, larger tablet, and discuss the topic of the lab as a group. The kits can also be used as content remediation or extension by having students work on the project topics included in the app.

I could envision a few kits put in the school library to be checked out so students could experiment at home. The only consumables that would have to be replaced are the Sample Stickers, the Sample Hub cards, and the batteries for the Light Stage. The kit could be used with younger students, but they would need adult supervision.

You can order the Mobile Microscope Duet package from the uHandy Duet Amazon page and you can save 15%, through September 12, 2019,  by using the promo code kathyBTS19

Follow uHandy on Instagram at @loveuhandy!


Monday, July 01, 2019

Web-ulous tools, part 3

Every couple of years, I share my favorite online tools, as I did in November 2017 and March 2014.

In this post, I am going to concentrate on tools to support Creative Commons image usage. I am not specifically going to cover the process of searching for CC images , but how to make sure attribution is included when these images are used.
Before I begin, I want to mention the use of watermarked images. Images are watermarked by the creator or site to showcase the image and offer a copy for sale without the watermark.
As educators, we need to model appropriate image usage, and should not use a watermarked image in anything we publish online or share with students. A discussion of watermarked images should be had with students so they understand both why items are watermarked and learn how to take the steps to watermark their own images if they desire to keep them from being “borrowed”.

Photos for Class

One great online site that solves the attribution problem for students is Photos For Class. This site allows student to conduct a search of Creative Commons-licensed images, receive the results, and download an image with an embedded citation/attribution included right on the image!
Although this is a great place to search for images and makes it easy for students to include attribution, educators should be aware there are some images that are not included in the results from Photos for Class. Below is the information on which Creative Commons licenses Photos for Class return results for and which ones they do not.

The Photos for Class search does not return photos that do not allow derivatives, of which there are many. In addition, they eliminate the “share alike” images which require the user, if they edit the image, to license their new image with the same license as the original creator assigned to their image.

Adobe Spark Tools

The Adobe Spark tools, Spark Video and Spark Page, have an image search engine built into the interface.
Free photos search in Adobe Spark Video
These searches, as per Adobe’s site, state that…
Spark searches Flickr for Creative Commons images and Pixabay for images tagged as public domain. Icons are retrieved from The Noun Project. When you search for images and icons, we’ll automatically add the credits at the end of every Video or Page.
The automatic attribution on the credits page is also great for students, as you can see below!
Automatic credit for CC-licensed image used in Adobe “Free photos” search
Adobe also states their searches only return Creative Commons-licensed images for images that are licensed as “commercial use with modification”. However, they remind the user to check the original image to verify the license.
With the return of images that are CC-licensed to use commercially, the pool of images located in the Adobe Spark tools “free images” search is probably smaller than the Photos for Class image search results, since it is more likely creators will allow their items to be used non-commercially than used commercially.

Keeping track of URLs

Of course, students can use use the image searches in Google Images, Flickr, or Bing to find their CC-licensed images. Do they want to edit an image? Do they need to use an image commercially? Or will an image be fine “as is” with attribution? Each of these search tools easily allows student to limit their search to a specific Creative Commons license, based on their need.
The thing to remind students to do is to save the URL of the image once they locate it. The full citation can be created at a later time, but it is important students can get back to the image itself to cite it properly.
Here are a few suggestions on methods to do this.
  • Have students keep track of the original URLs and brief description of the photos in a Word, Doc, or Pages document.
  • Have students use a page in Microsoft OneNote, in the app or on the computer, and add the URL and a small version of the image once they find it.
  • Have students create a Keynote, Google Slides, or PowerPoint presentation with blank slides, upload the image to the slide and add the URL to the slide, too. When they are done collecting images, students can export the presentation as images or jpegs. The URL and/or full citations now always stays with the images!
  • The teacher or students can create a Google Form template which includes the components of a Creative Commons image citation and students can save their information in a Google Sheet.
  • Students can create a Padlet page to store thumbnails of the photos When they add the URL to the link button, the photos shows up on the Padlet wall. When they click on the image, students can open a new window and be sent directly to the original photo page, which, in the images below would be the Flickr page.

Citing Creative Commons images

The Creative Commons site provides guidance in how to cite an image. Foran image I took of my home, a geodesic dome…
…the attribution would look like this.
“Geodesic dome home” by Kathy Schrock is licensed under CC BY-ND 2.0.
Title of image/video [linked to original image] by Author [linked to profile page] under License [linked to license description page].
If students were not live-linking the citation, it might look something like this (which covers TASL- title, attribution, source, and license).
“Geodesic dome home” by Kathy Schrock (http://flickr.com/photos/kathyschrock) at https://www.flickr.com/photos/kathyschrock/7491208600/. Creative Commons licensed under an Attribution-NoDerivs Generic 2.0 license.

Feedback

Do you have some tips and tricks to help students easily provide attribution for Creative Commons images? Please share your thoughts on Twitter! #kathyschrock

Saturday, June 01, 2019

Podcasts revisited

I have the students in my Wilkes/Discovery Instructional Masters degree class create a podcast as an assignment. In her reflection on podcasts, one of my student, Meredith Lambert wrote:
There is something different about the interaction between creator and consumer with podcasts then with written text. Because you’re hearing a person’s voice it makes it more personal. Recording your voice is much more personal than writing a reflection as well. 
After reading that, I realized I had not produced a podcast in a very long time. I created a podcast series when I was an Administrator for Technology and had teachers who were doing cool things in the classroom share their passions. The series of 14 podcasts ran from 2005-2008.
I found all those files and put them up on my Kathy’s Korner blog on Anchor.fm, my current favorite podcasting creation tool and hosting site. I was surprised how applicable some of them still are and laughed at how others were so dated!
Here are links to a few of them:
I even took the show on the road and produced some podcasts while away from the district with great educators!

Revisiting

Podcasts have grown in popularity since I created mine ten years ago. People love to listen to podcasts while driving, working out, walking, or when they want to be entertained. I am so glad the skill of listening has come back into favor!
So, instead of a full written blog post this month, I decided to create a podcast. After creating the podcast, I remembered how much time it actually takes to record, edit, and post a good podcast! Here are some organizational tips for those of you who want to give it a try!
  1. Find a good tool or app that allows you to create using their tool, upload you own audio file, will host the podcast, and automatically gives you an RSS address so others can “subscribe” to your podcast and receive any new episodes automatically. I recommend Anchor.fm.
  2. Write a script or at least an outline of what you will be talking about or, if interviewing someone, jot down some questions to guide the interview.
  3. Find a quiet place to record the podcast. Use a good microphone or a headset to keep outside noise at a minimum.
  4. Be prepared to edit the recording. Very few podcasts are perfect on the first take. To avoid re-recording, if you make a mistake, just pause (so you can make a cut) and restart that dialog again.
  5. I used to use Audacity to record my podcasts, but this time I went with Techsmith’s Camtasia and just exported the file as an audio file.

My Podcast

My podcast is called Kathy’s Corner and is hosted on Anchor.fm

Have you created podcasts in the past? Do you create them now? Provide us with some links on Twitter to your podcasts and let us know your tips and tricks for a successful podcast! #kathyschrock