Tuesday, June 11, 2013

You be the judge...

I received a very flattering email from a school librarian today. Here is the letter...


Of course, I wanted to see the site that rivaled mine, so I clicked on the link she provided. Here is that page...


Hum...lots of links. I looked at the bottom of the page to see the creator, and saw the other category links you see above, and then backed off the URL and got to the home page of the site, which you see below.


Nothing wrong with this dating site, but I wondered what librarian would have students use a page from this domain in class. 

So I visited the Pinewood Elementary School site. It had the two pages below.


What school has a Web site with two pages and no identifying information? Hum...

I checked the WHOIS records to see who owned the pinewoodelementary.org site and it was a company that, for a fee, keeps your identity private in the WHOIS records and puts their company's information in the record. Again, nothing wrong with that, but why would a school want to hide their contact information in the WHOIS record?

Needless to say, I am not adding the link to my page. Just be on the lookout for things like this. I wanted to lead you through the process I used to determine authority of author and reliability of source. Not so much.

Anybody else ever get a letter like this?


FOLLOW-UP (6/13/13)

I received lots of tweets and emails from others who have had a similar experience. One educator shared the letter she received.


The page the sender asked the person who received the email to add to her site, again, included information with no author. You can view the suggested page here.

And, when I looked at the Laramie Public Library site at http://laramiepubliclibrary.net, it was similar to the school site I had looked at above -- pretty but devoid of any identifying information. (BTW, this has nothing to do with Laramie, Wyoming. The Laramie branch of the Albany County (WY) public library can be found here.)

When I checked the WHOIS records for the laramiepubliclibrary.net site, the name of the administrator of the domain was the same company who protected the identity of the school site I looked up above.

Guess this is more common than I realized!

Friday, June 07, 2013

Two new tech gadgets: Bakbone and the HMDX Jam Bluetooth Speaker

I recently received a Bakbone, a unique accessory for holding a tablet in one hand, and a HMDX Jam Wireless Bluetooth portable speaker. Here are my thoughts on these new gadgets!

Bakbone

Want to easily carry your tablet safely with one hand while you use the other hand to tap, swipe and type on it? The Bakbone is an ingenious new accessory that works perfectly for this purpose! It is a great solution for those of you (or your students) who carry a tablet around the classroom or use the device to teach or present. 

The Bakbone includes two pieces. The first is a round magnet that you attach to the back of your tablet, or more likely, to the back of your tablet case. 


The second piece looks like a jewelry ring that attaches VERY strongly to the magnet. Once the ring is attached to the magnet, you simply put a finger through the ring and it is easy to hold the tablet with one hand. The best part of this solution is that you can easily rotate the iPad between the landscape and portrait orientations. The ring itself rotates-- there is no need to separate the ring from the magnet or take the ring off of your finger.


(I know there are other solutions out there that have some type of strap you slip your hand into to hold the tablet, but, to change the orientation of the iPad with that type of solution, you have to remove your hand and slip it back on it to work in the other orientation.)

The ring detaches from the magnet pretty easily, and instructions are also included in case you ever want to remove the maget (which is about 1/4" thick) from the back of the device or the case you have mounted it to.

The Bakbone comes in white and graphite colors right now, with a pink one coming out soon. The compay plans to donate $1 to Breast Cancer Awareness for every pink one sold.

You can watch a video about the Bakbone here to see it in action: http://www.youtube.com/watch?v=gLubSqH3OJ4

And to order one, simply visit his page: http://www.holdyourtablet.com/

The HMDX Jam Wireless Bluetooth Speaker

Okay, I admit it. I am a sucker for new shoes, tech bags, and portable speakers. I saw the Jam Wireless Bluetooth portable speaker at my local Bed, Bath and Beyond. The display caught my eye since the speakers are all packaged in "jelly jars" and come in many colors-- red, bright green (my choice), bright blue, purple, and some others. I did a little online research while I was deciding what color to purchase, and the reviews were mostly positive, especially in the areas of sound quality and loudness. (As with any Bluetooth device, there were mentions of some erratic connections, but I have not had that experience at all.)


The speaker comes with a USB charging cable and a small how-to booklet. Once charged, the speaker is said to last about 3 hours using a Bluetooth connection and 12 hours if you use the audio-in jack on the speaker. I charged it up, turned it on, and it paired flawlessly to my iPad via Bluetooth. (There is no pairing code needed, so I wonder what would happen if there was more than one BT audio source in range?)


I was very impressed with the sound quality and the volume of the speaker. I could hear it from quite a distance, as you can see in the video. (Please don't think that the iPhone video recording does justice to the sound quality to the Jam-- it doesn't. The audio quality is much better in person!)

I was also able to roam throughout the house carrying the speaker, straying far away from the audio source, so one could listen to music easily in various rooms.

The HMDX Jam is available on Amazon here: (or at your local Bed, Bath, and Beyond for the same price if you have your 20%-off coupon!).

Anyone have any experience with either of these devices or questions? Please leave a comment!

Monday, May 06, 2013

Wacom Bamboo Capture

Wacom Graphire (2002)
I have had a Wacom (pronounced "wah-kum") drawing tablet for years. In our district, we had computer lab sets of the Wacom Graphire2, which came out in 2002. The Graphire2 came bundled with software, including an early version of Adobe Photoshop Elements. 

Having a drawing tablet and a piece of software that easily allowed students to mark up images and create their own art products, opened an entirely new way of using a computer for our middle schoolers. The ability to hold a drawing tool just like they held a pencil was so exciting for them!

The tablets still work today with the Mac and Windows machines!

However, Wacom has continued to develop the capabilities of their drawing tablets. The Intuos pen tablets line includes various sized graphics tablets that can be used via pen or via touch. Their Cintiq pen displays line includes 13", 22" and 24" computer displays that have the ability to be used as graphic tablets, too!

The line of pen tablets that are most affordable, and I feel would work well in a school environment, is the Wacom Bamboo Capture. The Bamboo Capture has a drawing area of 5.8"x3.6" and the Bamboo Create has a drawing area of 8.5"x5.4". The Bamboo Capture would probably work best in a computer lab because of its smaller footprint, but the Bamboo Create, with its larger input area, would work well in support of a graphics lab you might have in your high school. The tablets include the drawing pen and also work as a large touchpad for controlling items on your computer's screen with just your finger.
Bamboo Capture (2013)
Software bundle

Both of these models have similar features and come bundled with software that would be useful for schools. I have been using a Bamboo Capture, and, in the box, both Adobe® Photoshop® Elements 8 and Autodesk® SketchBook® Express were included with the tablet. When using Photoshop Elements with the Bamboo Capture, the interactive pen is pressure-sensitive. That means, if you press hard, the lines are darker and if you draw lightly, the lines show up fainter. 

Wireless module

One of the coolest accessories for these tablets is the wireless module. With a component plugged into the tablet and a USB receiver plugged into the computer, the Bamboo Capture drawing tablet can be used while walking around the classroom. With this accessory, you can control your desktop easily while away from your desk, as well as mark up an image projected from your computer. You can even hand off the tablet for students to solve those tricky math equations from their seats!

Use in online classes and Webinars

I have also used the Bamboo Capture in both in my online classes and my virtual presentations. In the online classes, when I hold a synchronous session with the students in Adobe Connect, we have a shared whiteboard. The Bamboo Capture makes it easy for me to mark up this virtual whiteboard. 

In addition, when using any Webinar tool that allows me to share my screen (Adobe Connect, Skype, Google+ Hangouts, Screenleap, etc.), I can use the Bamboo Capture to mark up a Web page or slide, edit a student paper, or point out, graphically, items I want to the students to take notice of. Since most of these Webinars are recorded, the actions I take with the Bamboo Capture are saved along with the rest of the Webinar. 

I have also used the Bamboo Capture when using online screen recording tools such as Screen-cast-o-matic and Screenr, and off-line tools such as TechSmith's Camtasia and Adobe's Captivate, when creating instructional screencast videos for my students or Webinar participants.

Bamboo Dock and software

The Bamboo Dock, which is the desktop software installed with the Bamboo Capture drivers, includes its own suite of software. This software includes Doodler, Free the Bird, and Landmarker. I tried each of them and made a few screenshots and screencasts so you can see the capabilities.


Free the Bird

"Free the Bird" is a physics game, but also gives the user practice picking a point with the tablet's stylus as well as drawing.


Landmarker

Landmarker allows you to enter a zip code or place name and you are presented with the location on a map. You can then mark it up with the stylus and save it out as a JPEG.


Bamboo Paper

Bamboo Paper both comes with the Bamboo Dock software and is also available as an iPad app. It allows you to take notes, bring in images, create separate notebooks for your information and much more. You can easily share the notebooks with others, too.


Inkwell

Inkwell is handwriting recognition software built-in to the Mac operating system. It turns your handwritten notes into text. Here is a quick clip of this process while using the Bamboo Capture to enter handwritten text.


Win a Bamboo Capture! (US residents only, sorry...)

With all of these capabilities, how would you use the Bamboo Capture graphics tablet, wirelessly or wired, in your classroom to support teaching and learning?

Submit an idea to the Google Form below (or visit this link) and one lucky (randomly-chosen) contributor, will win their own Wacom Bamboo Capture! The package will include the Bambook Capture, the bundled software, such as Adobe Photoshop Elements, and the Bamboo Dock software, as well as the wireless module!

Submit your ideas by June 14, 2013 and the winner will be chosen on June 15, 2013. If you submit an idea, you will be agreeing to let me share that idea on the blog (without your name or email address).


Wednesday, May 01, 2013

Work smarter, not harder


“Work smarter, not harder.” — Scrooge McDuck (via Carl Barks, Disney illustrator)
Having iPads in the classroom, whether there are a few shared by the students, a cart that gets rolled in every now and then, or having a 1:1 initiative, does pose some interesting problems. How do you assign work and distribute files to the students? How do they turn in work to you? How do you assess their work and leave comments and get it back to them? How is all of this archived for future access?
All of these processes are collectively known as “classroom workflow”. Many educators with iPad initiatives are sharing their ideas, thoughts, and ways to do this effectively. There are also some no-cost Web tool alternatives that support this process, too.
One new feature of iOS6, the newest operating system for the iPad, allows images from the iPad to be uploaded through a submission box in a Web page. This helps if students have their documents as screenshots in the Camera Album, but it does not solve all the problems.
Sam Gliksman: iPad in Education for Dummies
Sam Gliksman, the author of iPads in Education for Dummies, posts some information about classroom workflow. He suggests using Dropbox to both share information with students via your public Dropbox folder and, if your students have email accounts, they can create a Dropbox account and share a folder with you so you can upload items to their Dropbox.
One other option that I have used is using DROPitTOme. This online tool allows you to set-up a unique upload address and a DROPitTOme folder appears in your Dropbox list, as seen below. You then can give this passworded folder address to students and they can upload directly to your Dropbox with no chance of seeing anyone else’s work.
Sam also recommends the use of Evernote for iPad classroom workflow. With the fact it can run on almost any device, from computers to smartphones, it is perfect, especially for BYOT environments. Students can submit files from their iPad via a special email address to your Evernote account even without an Evernote account, too. With an Evernote account, students can share a collaborative folder in your account.

Jonathan Wylie

Jonathan Wylie, an instructional technology consultant for Grant Wood AEA (Iowa) is a source of all types of great information! (If you are on Twitter, be sure to give him a follow at @jonathanwylie.) In a Slideshare presentation found here, Jonathan provides some ideas of how teachers can manage a digital workflow in the classroom.  He includes Dropbox and Evernote, but extends it also to include how to print with the iPad, and the use of Google Drive, learning management systems, and other tips and trips. The presentation is embedded below.


Greg Kulowiec

Greg Kulowiec is a consultant for EdTech Teacher, a Boston-based educational technology consulting firm. A former social studies teacher, Greg presented at the New England 1:1 iPad summit. He concentrated on the sharing and submission of work to and from the iPad. In his presentation, he covered Evernote, Box, and Dropbox, as well as Google Forms, Web Dav options, Posterous, audio and video submissions, and use of social media to share work and information. The slideshare presentation can be found here and is embedded below.


David Berg

David Berg is a community college psychology professor who presented a paper at a conference entitled “Using the iPad in Your Academic Workflow“. Although specifically written for teachers of psychology, Dr. Berg includes an overview of why to use the iPad to support teaching and learning as well as specific apps that are useful to him. He includes the distribution and submission of files, but also provides a list of iPad apps for project and task management, writing, communication and collaboration tools and apps, as well as information management, and demonstration apps.  Dr. Berg includes some interesting new apps that you might want to check out!

Don Orth

At the other end of the spectrum, Don Orth, the Director of Technology at Hillbrook School (CA), has been working with a 1:1 program for a number of years. In his blog post “Digital Workflow in Middle School with 1:1 iPads“, Don starts the conversation about the disadvantages of paper in the classroom, and goes on to discuss his school’s solution to the classroom workflow problem. He includes an overview of iTunesU for K-12 schools, which recently became available, as a viable option for sharing material. Don also talks about a commercial solution, eBackpack, which provides the ability to mark up student work and return it. (Another commercial option to look at is Showbie.)

There are also many apps for the iPad, some tied to online sites, that help with the classroom workflow. These include
I have a page devoted to the workflow in the mobile device classroom that I will add to as I discover new apps, suggestions, ideas, tips and tricks. You can access that page at https://www.schrockguide.net/ipads.html

Monday, April 01, 2013

Mirror, mirror, on the wall


Who does not want to share resources wherever they are? Whether showcasing a Web page, a blogs, or a content-rich video, you need to become familiar with the many ways to project and mirror your iOS device (iPhone, iPad, iPad Mini, iPod Touch) to be able to share the resources with larger groups of educators or students.
The first thing you need to do is to open the Safari browser on the tablet, and go to http://streaming.discoveryeducation.com/ (On a side note, if you are going to want to download clips from DES, try using the mobile browser, iCab Mobile. Here is a quick overview by Mark Hammons on how that is done.) Once you open Discovery Education Streaming in the browser window, you just log in to locate your resource. You can zoom in to have the video fill the screen.
Later on, when you employ many of these methods, you will have to turn on AirPlay Mirroring on your iPad. Until you are connected to an AirPlay device, you do not see the AirPlay icon. To locate the AirPlay icon on the iPad, you double-tap on the home screen, and swipe right in the bottom task bar until you see the icon (shown a 1 below). First, tap on the icon. Secondly, chose the computer you are projecting to (the AirPlay device in this case is KathysMacMini). Thirdly, turn mirroring on.
There are quite a few different options for projecting your iOS device. These options work with the newer iPads and iOS devices. However, most of them require you to be on the same WiFi network as another device. In some  schools, districts, and conference centers, the networks are not set up for this. There is a way to create a private (ad-hoc) network between a computer and a iPad if need be. The devices can then connect to each other wirelessly, but not to the network in the building and probably not to the Internet.
Directions for creating an ad-hoc network on a Mac computer.
  1. Go up to the WiFi symbol on the taskbar on the desktop or laptop.
  2. Pick “Create Network” and you get the “Create a computer-to-computer” network box.
  3. Give it a name, pick either channel 1, 2, or 11, and secure it with a password if you want to.
  4. On the iPad, go to Settings:Wi-Fi and pick the ad-hoc network from the list to connect to it.

Options for mirroring

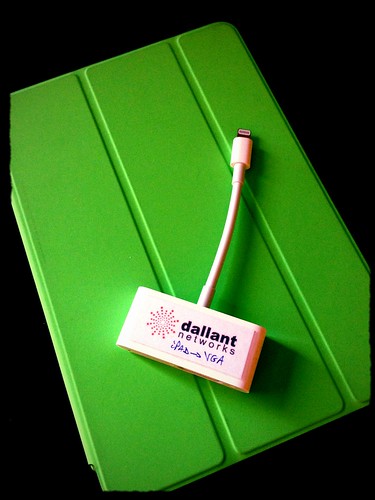
VGA and HDMI Dongles

The right connector
http://www.flickr.com/photos/globalx/8417435426/
If you do not need to roam with your iPad, Apple sells adapters (commonly called dongles) that come in VGA and HMDI for both the 30-pin and Lightning ports, and also in DVI for the 30-pin connector. When your iPad is hooked up via a dongle to a projector, monitor, or TV, everything you do on the iPad is projected onto the screen. Teachers often ask if they can project onto the interactive whiteboard. The answer is yes, since all you are doing is replacing the input to the whiteboard with an iPad. However, will not be able to control the iPad from the whiteboard. There is a Smart Notebook app for the iPad available, but it is really intended for showcasing your Smart Notebooks.

AppleTV

Of course, the $99 AppleTV, hooked up via an HDMI cable to a television, monitor, or projector with an HDMI port, allows you to mirror your iPad to the screen wirelessly, over the WiFi network. Both the iPad and the AppleTV need to be on the same WiFi network. The sound comes over to the TV, monitor, or projector, too. However, there is no built-in way to record what goes on.

Reflector

Reflector is my first choice for mirroring the iPad. It works like this. Reflector is a desktop software program that is available for both the Mac and Windows operating systems. The cost is $14.99 for a license for one computer and $45.99 for a license for five computers. Once you install the software, Reflector turns your computer desktop into an AirPlay device. This means, you can wirelessly stream your iPad’s screen and it will show up on the computer desktop.  Another cool feature is that multiple iPads can be projected to the computer desktop at one time. This is fun if students are all showcasing a photo or created image!
The great thing about Reflector is it not only mirrors, but also moves the sound from your iPad over to the desktop speakers. You are free to roam around the classroom. And, the bonus feature is you can have Reflector record what is going on on the projected iPad screen and save it for future viewings. Watch a short video I made with Reflector and DES: Airplay with Reflector

AirServer
AirServer is similar to Reflector and works on both Apple and Windows operating systems. The cost is $14.99 for a license for 5 computers, or there is an education option for 3 licenses for $11.99. It, too, runs on the computer, turning the computer into an AirPlay device with the iPad’s audio being transferred to the computer. And it still requires the iPad and computer to be on the same WiFi or ad-hoc wireless network. The only thing that is lacking is the ability to record. (If you have Tech Smith’s Camtasia or Adobe’s Captivate, you can use either of those programs to record the mirrored iPad on the computer.)

iTools

Itools is a recent entry into the iPad mirroring arena. It does not allow you to be wireless but it allows you to connect your iPad to a comptuer USB port via the iPad’s USB cable and project your iPad onto the  computer screen. I can get the desktop software to install on the Mac, and can use some of the functions, but I have tried the mirroring function on three different machines and cannot get it to work. I tried it on Windows 8, and it gave me the message “the iOS on your Apple Device is not supported” when I tried to display the iPad’s screen. (I currently have 6.1.3.)  However, some educators are having good luck with it, so give it a try!

You can see there are many ways to mirror the iPad. When it is imperative that it works, carry an iPad VGA dongle (or an AppleTV and the Kanex ATV Pro connector if you want to roam with the iPad). This set-up will always work. You can experiment with both Reflector and AirServer and try to use them, too, but sometimes even the ad-hoc network does not work and the iPad and computer cannot see one another.

Sunday, March 03, 2013

New cool stuff from Ipevo

I continue to be impressed with the new items Ipevo comes out with to support teaching and learning.

At FETC in January, I was able to see the attachment for the Perch iPad stand that allows you to use the iPad as a serviceable document camera.


Snapshot from the Ziggi-HD 5 megapixel camera
The Ziggi USB Document Camera is going to be updated soon to the Ziggi-HD model. I got my hands on one, and took at look at the output from its 5 megapixel camera (up from 2 megapixel in the previous model) with a resolution that was bettered from 1600x1200 on the original Ziggi to 2592x1944 on the HD model.The Ziggi-HD still includes a 2" macrofocus and controls on the head for exposure, snapshot, and autofocus. The iPevo Presenter software allows for a 6x digital zoom with the Ziggi-HD, too.

I also used the Ziggi-HD to record a movie of a Sock Puppets presentation on the iPad to see how that would work.


The other new cool thing from Ipevo is the ability to stream the images from any Ipevo document camera wirelessly to your iPad or computer with their WS-01 Wireless Station. And, with the addition of the Ipevo Whiteboard app, you can mark up the image on the iPad just like you can on an interactive whiteboard!

Imagine your iPad is hooked up to a projector or wirelessly to a monitor or computer via Airplay (with AppleTV or Reflector) and your Ipevo P2V, Ziggi, or Ziggi-HD are projecting wirelessly to your iPad. It does it by creating an ad-hoc network between your device and the WS-01 Wireless Station, and you can attach your computer to that same network. How cool is that? (The WS-01 also acts as a bridge to your local Ethernet or wireless network, too, so you do not lose access to the Internet on the devices that .)

Below is a short demo I made using the Ipevo Whiteboard app on the iPad and used Reflector to record the projected image on the desktop. There is no audio recording in the Whiteboard app, so there is no sound. You should be able to figure out what I am doing-- marking up, adding arrows, taking a screenshot, etc. The set-up is Ziggi-HD USB Document Camera attached to the Ipevo WS-01 Wireless Station, projecting the image wirelessly to my iPad which is hooked to the WS-01 via an ad-hoc network, marking up the image using the Ipevo Whiteboard app, and recording the whole thing via the Reflector app on the desktop. It sounds like a lot of techie stuff going on, but it is really easy! The manual that comes with the WS-01 (see it here) gives good directions.


Items discussed in the blog post:

Friday, March 01, 2013

Sharing the whole day through!

When students are collaborating and working on group projects or presentations, there is often the need to collect assets so they all wind up on one machine or in one online folder. In the “old” days, when students had a shared folder on a file server, they would each drop the files into this shared folder and the person in charge of the compilation of the information or the final product would grab the items from there. When using iPads, there are many options that are available, in addition to just emailing the files to one student, for the sharing of files.
Mover+ (https://itunes.apple.com/us/app/mover+/id320907954?mt=8) is a free app that allows files to be moved from iPad to iPad by simply opening the app, putting an item on the “table” and flicking it to side of the table with the other person’s device name.  In addition, there is an application for the Mac called Mover Connect, which allows the items to be flicked to and from the Mac desktop, too.
Bump (https://itunes.apple.com/app/bump/id305479724?mt=8) allows photos and files to be shared between iPads and iPhones by simply tapping the devices together. And, when going to the http://bu.mp site with your computer’s Web browser, you can share items from a device to the desktop by bumping the space bar on the computer.
Chirp (https://itunes.apple.com/us/app/chirp/id529469280?mt=8) allows you to share files via sound.  Just open Chirp on each device, add an item, and hit the “chirp” button. The image is copied to the other person’s device using sound.
DropCopy Lite (https://itunes.apple.com/us/app/dropcopy-lite-wireless-file/id358310121?mt=8) allows files to be moved easily between devices that both house the app and are the same wireless network. The first 25 files views are free, but then you have to upgrade to the full version for $4.99 if you want to keep using the app. In addition, there is a version that runs on the Mac that allows easy transfer from device to desktop and vice versa. (http://10base-t.com/downloads/DropCopy_latest.zip)
Instashare (https://itunes.apple.com/us/app/id576220851?mt=8) just released their iPad version of the app. Instashare allows you to share items via WiFi or Bluetooth, and you can share any type or size of file. You see the other devices you can share with, and you simply drag the file from your device to the image of the other device.  There is also a Mac app that allows you to share files with the desktop.

Sharing files when not in the same room
Although intended to be used when in the same location, you can record a Chirp (https://itunes.apple.com/us/app/chirp/id529469280?mt=8) embed it as an audio file on a Web page, and someone with Chirp can get the file!
Xsync (https://itunes.apple.com/us/app/xsync-file-sharing-dropbox/id464201801?mt=8) is and iPhone app intended to allow sharing of files when you might have two different types of devices in the same room. But it can also be used to share files long-distance, too. You first open an audio file, a photo, a video, a contact, or a calendar on your iOS device or in Dropbox when within Xsync. Xsync actually sends the item to their server and presents you with a QR code for the item. You can distribute the QR code as an attachment, via SMS, or put it on a Web page, and anyone with a QR code scanner can scan the QR code and receive the file!
DropItToMe (http://www.dropitto.me) is not an app, but a plug-in to Dropbox. When DropItToMe is installed, it creates a folder in the Dropbox account that will allow others to upload files to that folder. All you have to do is distribute the DropItToMe URL to others and they can upload their files to that folder.
Sharing files between the iPad and the desktop
There are plenty of apps available that allow you to wirelessly connect your iPad to a desktop and move files back and forth. They all pretty much work the same way— the two devices need to be on the same wireless or Bluetooth network, you start the iPad app, one of the choices is a sync between your iOS device and a computer, you get an IP address to type into your desktops browser, and you can access the files that are on the iPad and upload files from the desktop to the iPad. Once items are on the iPad, you can save them for use in an appropriate app on the iPad and even zip them up. Most of these apps also have converters built in so you can watch videos, look and Keynote and PowerPoint presentations, and Web archives directly in the file sharing app.
Two of these apps I like use are Air Disk Pro (https://itunes.apple.com/us/app/airdisk-pro-wireless-flash/id505904421?mt=8) and Phone Drive (https://itunes.apple.com/us/app/phone-drive/id431033044?mt=8), both which cost $1.99. Phone Drive’s new update includes the ability to wirelessly sync files with Dropbox and iCloud, too.
There are also a number of no-cost versions of file sharing apps, but they usually have some advertising built-in.  A couple of these include Air Disk Free (https://itunes.apple.com/us/app/air-disk-free-wireless-http/id444063740?mt=8) and Air Drive (https://itunes.apple.com/us/app/air-drive-your-file-manager/id419311671?mt=8).

Creating an ad-hoc network
There are times when desktops and iPads cannot see each other when on a wireless network like in hotels, airport, and some schools. There is a way to create an ad-hoc (private) network between the desktop and the devices. This should allow you to pass files back and forth between the desktop and the iOS devices, and may even allow the iOS devices to move files back and forth between two iOS devices.
  • Simply go up to the WiFi symbol on the taskbar on the desktop or laptop.
  • Pick “Create Network” and you get the “Create a computer-to-computer” network box.
  • Give the network a name, pick either channel 1, 2, or 11, and secure it with a password if you want to.
  • On the iPad, go to Settings:Wi-Fi and pick the ad-hoc network from the list to connect to it.
Sharing files has never been easier, whether you are sitting next to someone or halfway around the world! Install at least one app for sharing files locally, one for sharing across the miles, one for sharing between the iPad and the computer, and practice setting up an ad-hoc network for when you might need it!

Sunday, February 17, 2013

Pay it forward

I am a big believer in "paying it forward". I know, from personal experience, that helping someone out or doing something nice for someone makes the world a better place. When that person you support helps someone else, and on and on, the movement spreads.

I consider Twitter a perfect example of paying it forward. I find something to share I feel my followers will benefit from and, if they think so, they send it off to their followers, and the benefits multiply! 

If I see some great link or idea or thought from the people I follow on Twitter, I re-tweet it to my followers, and am happy to have found something of interest for them.

I don't follow everyone who follows me on Twitter. As much as I would like to, I currently have over 22,000 educators who follow me on Twitter. I consider it an obligation to provide them with links, ideas, things I discover, and upcoming events of interest. I do throw in some personal things at times. I am hoping that is okay with them.

I follow 212 people on Twitter. They are educators who provide me with great ideas, have different networks than I do and retweet items I never would have seen, and are always there when I have a question or concern. 

Of course, unless I follow a person on Twitter, they cannot direct message me. Some followers get very upset they cannot direct message me and chide me for not following them. That's silly. I hone my PLN to what I need and keep it manageable to make sure it is useful. It is in constant flux as I follow and unfollow tweeters. In addition, my email address is in my Twitter profile (something I suggest everyone should do) and any one of my followers can email me at any time!


I look at the profile of each person who follows me on Twitter as they begin to follow me. It is disheartening to me that many educators continue to protect their tweets. They are not paying it forward, in my opinion. I want to visit their profile, see the things they are tweeting, and decide if I want to follow them. I don't want to be forced into picking to follow them, waiting for them to approve me, then checking out what they post, and then decide to continue to follow them or unfollow them.


Tweets from users who have protected accounts do not show up in a Twitter search. I also didn't think others could re-tweet tweets from those that protect their tweets. I actually was unsure about this, so I asked my twitter followers.

My tweet:


Here are the first few answers I received (read from the bottom up)


I found Ben's initial comment and then follow-up interesting, but true. Although Susan said the same thing about cutting and pasting. And my favorite was from Greg, who agrees with me, that teachers need to "tweet in public" and not protect their tweets.

And Ben, who tells teachers that it is their digital footprint and their choice to keep their tweets protected, also stated:


(Late addition: I am getting mixed messages on whether you can or cannot re-tweet protected tweets. It may be dependent on the browser-based version or whether you are using a specific Twitter client.)

I truly believe that collaboration and sharing and participating are really important in social networks. I encourage teachers who feel they have personal stuff in their Twitter account, that they don't want the world to see, to create a personal Twitter account and protect that one. 

Keep your professional account wide open so others can see the great things you are tweeting, easily follow you to keep up with your new ideas and thoughts, and can re-tweet your super ideas to their Twitter followers!

Please pay it forward!

Sunday, February 10, 2013

Snow Day Fun!

Well, we are still in the throes of a blizzard and I have no Internet access, no Wi-Fi, no cell service, and most of what I want to work on is in the cloud. (Note to self: keep copies locally when a blizzard is approaching!)


The SmartScope iGo
However, I did have a new gadget to review, and I managed to get to that! The item is the SmartScope iGo Wi-Fi microscope. It is a handheld microscope that works with both the iPad and iPad Mini, Android tablets, and the iPhone and Android phones. You can hook up to three mobile devices at once to each SmartScope iGo.


When you turn the microscope on, it creates an ad-hoc (private) network between itself and the iPad/Android devices. You simply look at your settings in Wi-Fi area on your mobile device and chose the microscope's network. The password to join the private network is a default password that can be changed. (Quick start instructions.)

Ad-hoc Network
You then simply launch the free Wi-Viewer app, which allows what is shown on the microscope to be shown on the mobile device’s screen. (Since you are on a private wireless network, the Reflector app will not work to mirror the iPad's screen, since the desktop and laptop have to be on the same Wi-Fi network. I connected to the ad-hoc network with the desktop, but Reflector would not allow mirroring.) To showcase what is on the iPad or Android device’s screen you will need a VGA connection to a projector or an AppleTV.


Item I viewed with the SmartScope iGo


View of the item using the Scope and the Wi-Viewer App


However, there is a simple way to solve this built right into the Wi-Viewer app! You can choose to record the entire microscopy session! The file is saved as an AVI file, which I was able to get off of the iPad and onto the Mac desktop through the Apps File Sharing section in iTunes. I could then open the AVI file in the VLC app and I also easily converted the AVI file to an MP4 file to be able to play natively on the Mac.

The wireless SmartScope iGo microscope has all its features right at your fingertips when using the device. These include the focus button, the knob to increase or decrease the LED lights as needed, and a button to quickly take a snapshot that saves to the iPad’s or Android’s Photo app. The microscope comes with 3 rechargeable batteries and a charger and is rated to allow you about 3.5 hours of microscope use on a charge.


Video recording using the SmartScope iGo (no sound)


Screen for viewing the recordings


The magnification choices, when using a full-size iPad, is 1x - 80x. I was using the iPad Mini, so my magnification was different. The Wi-Viewer app software has a quick start button to begin and end the recordings, the ability to view the recording on the iPad, and also has an image capture button. I can definitely see one of these devices for every two students in a lab setting, with one controlling the recording and images and the other student actually controlling the SmartScope iGo. And, as the teacher, you can hook up to each SmartScope iGo being used and both view and record what each pair of students is doing since up to three mobile devices can hook to one Scope. The mobile device and the SmartScope iGo can be up to 10 meters apart and still connect.

The cost of the SmartScope iGo is $329, and there is an optional gooseneck stand available for $99 or a cradle for $49 . Contact info@smartschoolsystems.com if you want more information or wish to inquire about volume purchasing.

P.S.
Now, to get this project together without Wi-Fi, during the blizzard, I used Bluetooth to connect the Mover+ app on the iPhone to the iPad Mini to gather all the images onto one device. I then used the desktop component, Mover Connect, to move all the images to the desktop so I could work on this blog post. (Again using Bluetooth.) Since we still did not have Internet access, I moved the Word file, the images, and the video back to the iPad Mini via the AirDIsk Pro app and then used the Blogger app to post it. Just in case you were wondering!