Wednesday, June 13, 2012

Cool DIY project (or not)!

VGA to 30-pin and USB connection 1

 One of my problems, when considering presenting from the iPad is the ability to keep it charged and hook it up at the same time to the VGA connection present on most data projectors. Both the sync/charge cable and the VGA dongle for the iPad need to use the same 30-pin connector port on the base of the iPad.

Apple HDMI Dongle
Apple offers the HDMI dongle for the iPad that includes a pass-through for the sync/charge cable. I guess this is for watching multiple movies while the iPad is attached to your television via the HDMI port and being able to keep the device charged for the movies.

I know you can mirror your iPad using an Apple TV attached to your television, and you will soon be able to mirror your desktop the same way.

But, in most classrooms and presentation arenas, the data projector does not have an HDMI port, but has a VGA port. I started looking for a VGA dongle for the iPad that provided both VGA out and also allowed the iPad to be powered at the same time.

After extensive searching, I almost gave up, until I came across these DIY (do-it-yourself) project instructions. However, instead of attempting this myself, I decided to purchase one from the creator of the instruction set. He had already modified several and the reviews were outstanding.Well, I received it today and it works perfectly! I was able to project via VGA and keep the iPad charging!

The idea is simple-- the creator opens up the VGA dongle and solders a USB cable in, so you can charge the iPad via the USB cable and the power brick, as well as attach to a projector via the VGA port on the dongle. The iPad will project and stay charged.

Here are two photos of the completed project from two different angles.


VGA to 30-pin and USB connection2
If you are interested in finding out more, please send me an email and I will give you the contact information for the creator.

Saturday, June 02, 2012

Mirroring the iPad with your own network

So, as I have been on the road a lot this past year, airports, hotels, and coffee shops have become some of my favorite places to get work done. Recently, I have been working on iPad workshops and wanted to record the iPad screen by using the Reflection app for Mac. 

When the iPad and laptop are on the same wireless network, and you launch Reflection on the laptop, the laptop becomes an AirPlay device for the iPad. On the iPad, you double tap the home button, swipe right, chose the AirPlay icon, pick your laptop from the list, and choose to mirror the iPad screen.

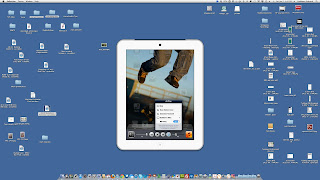
The iPad shows up on the computer screen as in the image below, and, through the app, you can record everything you do on the iPad and save it as a movie file for demo and/or training.

iPad mirrored to the desktop using Reflection

However, when trying to do this same thing in a hotel, an airport, or a coffee shop, I could not get the AirPlay icon to show up on the iPad. I could not get the two devices to see one another. Well, of COURSE I couldn't! Why would you want any other device on a public WiFi network to see your laptop or iPad? The networks are designed to keep your stuff secure (even from yourself!)

Since I have a few iPad workshops coming up, I wanted to make sure, if the network I was going to be using prohibited me from seeing another device, I had a solution that would work. I actually wound up with two solutions!

FIRST SOLUTION


The first was to create an ad-hoc or computer-to-computer network between the Mac desktop/laptop and the iPad. It is easy! 
  • Simply go up to the WiFi symbol on the taskbar on the desktop or laptop.
  • Pick "Create Network" and you get the "Create a computer-to-computer" network box. 
  • Give it a name, pick either channel 1, 2, or 11, and secure it with a password if you want to. 
  • On the iPad, go to Settings:Wi-Fi and pick the ad-hoc network from the list to connect to it.


AirPlay choices on the iPad


Start up the Reflection app on the desktop/laptop, double tap the home button on the iPad, swipe right, chose the AirPlay icon, pick your desktop/laptop from the list, and choose to mirror the iPad screen and you are in business!


 You will not be able to use the Internet on the computer when the computer-to-computer network is on, so, when you are done, don't forget to go to the WiFi icon on the desktop and choose to "Disconnect from . This will close your computer-to-computer network.


Since the Reflection app is only available for the Mac, there is another alternative for Windows and Mac called AirServer. The documentation states it will work over an ad-hoc network, too, so follow the directions for creating the Mac ad-hoc network above and find out how to create one in Windows 7 here.


SECOND SOLUTION


While searching for an answer to my question, I also came across a reference on how to create an ad-hoc network using the new CloudFTP device, which also does many other things, too.


I remembered that I already owned a Zuni Connect Wireless Travel Router and USB Charger which was intended to create a secure personal network in a WiFi or wired environment. I figured if the CloudFTP device could create an ad-hoc network between two devices, perhaps the Zuni Connect could, too. I simply powered it up, attached the desktop/laptop to the ZuniConnect network, and used that personal network it created to create the ad-hoc network with my laptop/desktop. I was able to connect the iPad via AirPlay on that private network and mirror it to the desktop/laptop. (I am going test this in another environment than my home to make sure it really does work!)


So, I have two solutions to utilize if the network I am using will not let my two devices see each other over a computer-to-computer network! Have you come up with some additional solutions?

Friday, June 01, 2012

iPad Apps Review 1: FreeSpeech & Draw on Slides

I decided to combine two short iPad app reviews in one blog post.

FreeSpeech

The first review is the release of my son's no-cost (and no ads!) AAC app, FreeSpeech, which was created to support those with communication disorders. The goal was to provide an app that would be easy to use, scalable, and encompass new features. The team has been developing the app for over a year and formed a non-profit, GiveSpeech, to help keep the app free. They are working hard on enhancements all of the time!

The app includes a series of symbol libraries upon download, and the ability for the user to add their own icons. However, the coolest features are the community and collaboration aspects. Users can upload and share icons they create or photograph and also download those from others from within the application iteself. This allows for an never-ending shared library of all kinds of new icons! I just visited the community area and downloaded a set of photos called "Trip to the Farm" uploaded by another user. I can see the community growing and perhaps including a discussion board to include requests for images needed and users volunteering to create those icons for others.

I used the Reflection app to create a short video to showcase FreeSpeech. This is only a brief overview of how it works. (The voice sounds a lot clearer in real life than it does in the video, promise!)


Download FreeSpeech for yourself and try it out!  There are also instructional videos located here, but FreeSpeech is so easy you probably won't need them!

Take some photos in your area of things that others might not have in their region or town and take the time to upload them to the FreeSpeech community area. I am going to add some regional Cape Cod items like lighthouses, windmills, and cranberry bog to the community soon.

Draw on Slides

In the video above, I took a screenshot of the last screen of FreeSpeech and added an image to my photo library. I then used an app called Draw on Slides to mark it up. You can see that there are different colors and thicknesses of lines to chose from as well as the ability to place an arrow on the line if you wish. This marked up image can be saved as a new image to the Photo Library, sent to Facebook, or emailed. Draw on Slides is a useful app to mark something up in front of students or share an instructional image with others.